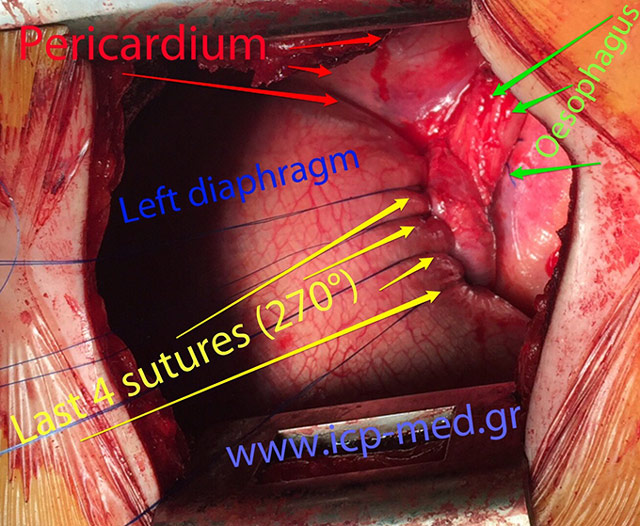
Belsey Mark IV Fundoplication
8. The same as image 7, with Arrows to explain the anatomical structures shown
Home | Previous